

Operations using API
How Staple’s APIs may be used to automate specific tasks?
Invoice flow with no human interaction
In this section, we describe the API process for sending a document to Staple, and retrieving Staple’s predicted data for the document without any human intervention. Scanning a document is a primary function of Staple. Here is an example of a flow where a user scans an invoice document using the API calls.
POST Registration
To register an account via the API, navigate to the endpoint that belongs to the Registration of the user (Staple API documentation > Users > Registration). Hover over to the request section and go to the “Body” tab. This tab consists of a request sent to the server. Fill out the information in all required fields. The optional fields can be blank, but we recommend filling in all user details. An example of the Registration is shown below.
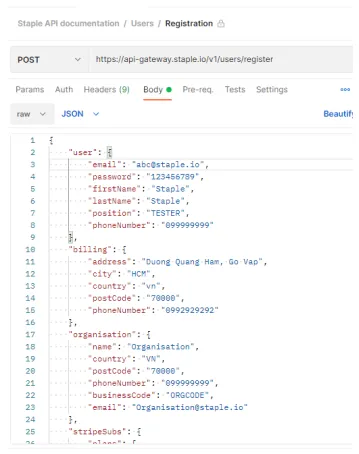
After editing the code, send the request by clicking on the “Send” button. It sends the request to the server and accepts a response with the requested data. A response with two fields, an access token (accessToken) and a refresh token (refreshToken), is generated.

The access token is used for the authentication of the user. Once a user is registered and logged in, the access token is used in identifying the user. Any request sent by this user has the access token in its header. This helps the server to identify which user is making the request.
The access token is short-lived. It can be used only for some time after which the user will have to re-authenticate themselves and generate a new access token. This can be skipped using the refresh token. It requests the API to get a new access token that allows the user to continue accessing the application resources.
POST Login
Once a user is registered, they can log in to the server using the credentials used in the registration. Navigate to the endpoint that belongs to logging in the user. In the request section, open the tab containing the body of the request and enter the credentials.
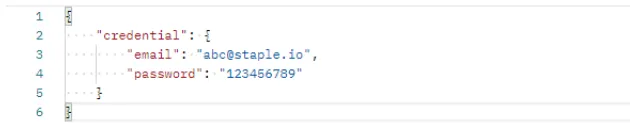
This creates a response and gives tokens to the user. Here, an additional token (apiKey) is generated. The api key is used for uniquely identifying the user and authenticating its requests and access to resources.

POST Create Group
To upload a document to a user’s account, a group must be present. A group contains a queue which holds similar types of documents. If a group is not present, the user has to create a group. An endpoint is curated for the same.
In the endpoint, the user needs to fill out the required fields in the headers section. The headers are an important part of the API request and response as they contain meta-data associated with the request and response. For the user to have access to the resources to be accessed by the request, some fields of the headers should be updated.
The mandatory fields are “Authorization” and “x-api-key”.
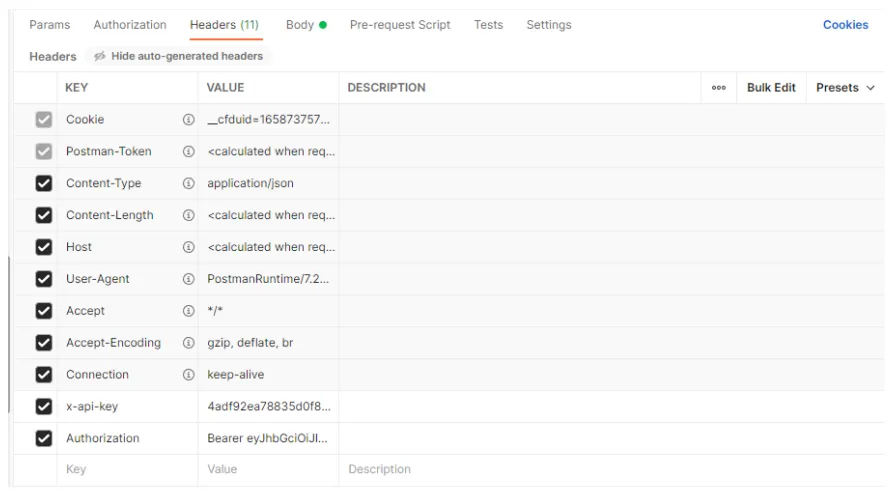
In the “Authorization” of the Headers section, replace the token variable with the value of the access token generated after logging in and keep the word “Bearer” undisturbed. Next, edit the value column for the key named “x-api-key” to the value of generated apiKey. Each step after this will need the x-api-key and Authorization values to be altered. It ensures that the current user has access to the operations being performed via the request. In the Body section, fill in the required fields.

This generates a response with details of the created group. The “id” field holds the unique id for the generated group.
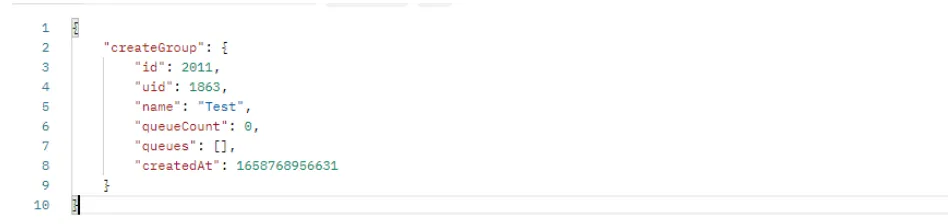
POST Create Queue
To create a queue, follow the same steps as above in the code for creating a group. Set the qid field to the id of the desired group in integer format. Then, fill out the fields in the body section. Users can set the optional fields to null or leave them untouched.
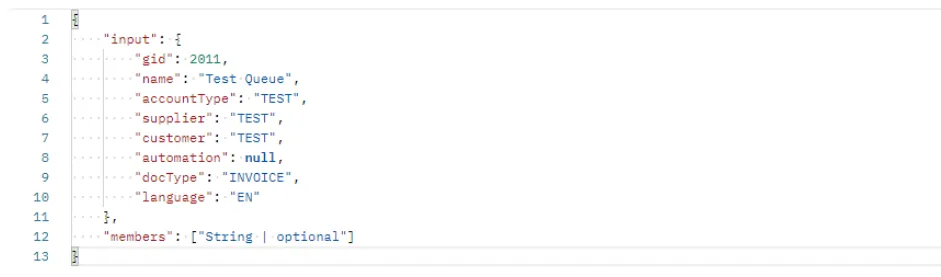
This generates the response with details of the queue created.
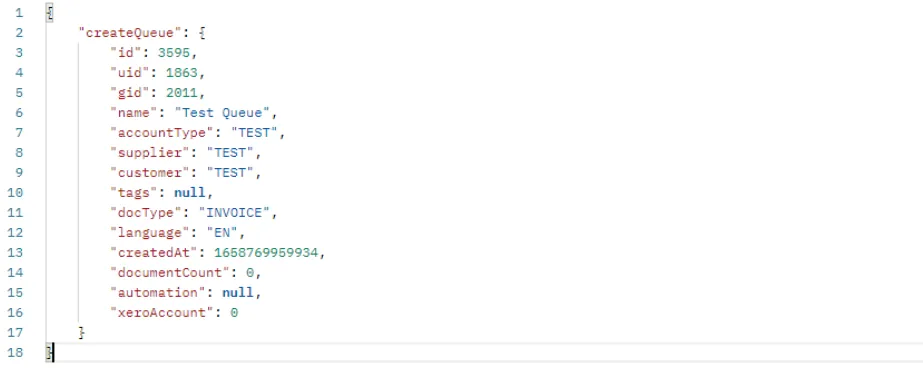
POST Upload Multiple Documents
Upload documents to a queue using the Upload Multiple Documents endpoint. Here, fill out the required headers. There are two fields to be filled up in the body section. The “qid” is the id of the queue where the documents have to be uploaded while the “files” rows take a file as its input. To do so, we need to change the data type of “files” to Files. Click on the empty space beside “files” in the same cell. A dropdown showing data types will be displayed. Select Files from the same. Then, choose the file from the device.
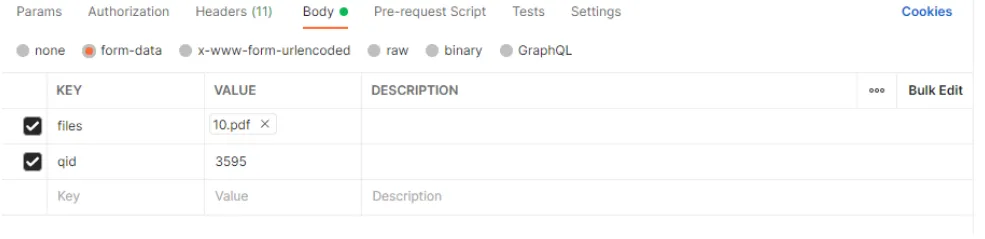
The generated response will be

Scan documents asynchronously
Use Scan Asynchronous Document for a single document, or Scan Asynchronous Multiple Documents for multiple documents. Choose a queue configured with the model you want to use. Processing runs asynchronously; use the returned document IDs to retrieve results with Get Document by ID after scanning finishes.
GET Get Document by ID
To get a document in JSON format, go to the endpoint named “Get document”. This is a Get request fetching information from the server. In this case, it returns the scanned document. Users can also export the document. The difference between the two is that the get request returns the document in a rich format while export is mostly used for automation solutions. Fill up the “x-api-key” and “accessKey” in the headers. In the request URL, replace the docID variable with the id of the document to be accessed. Send the request and the response containing all the information is received.
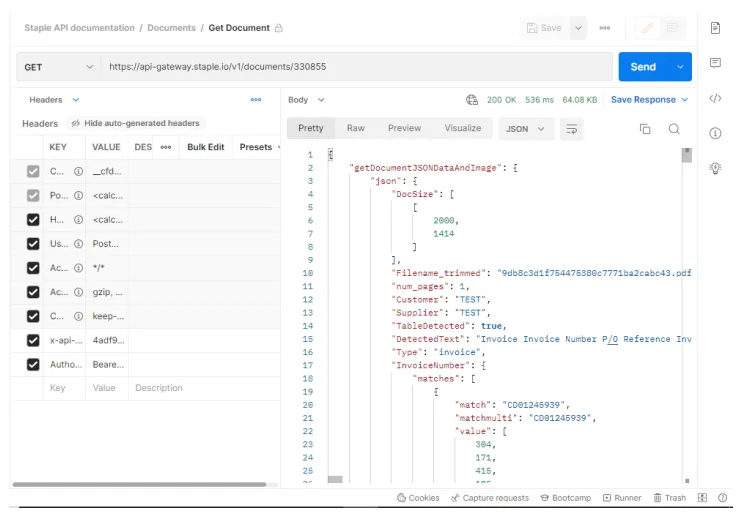
The changes will be reflected in the account.
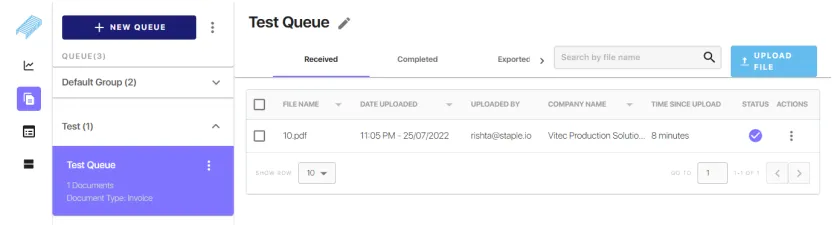
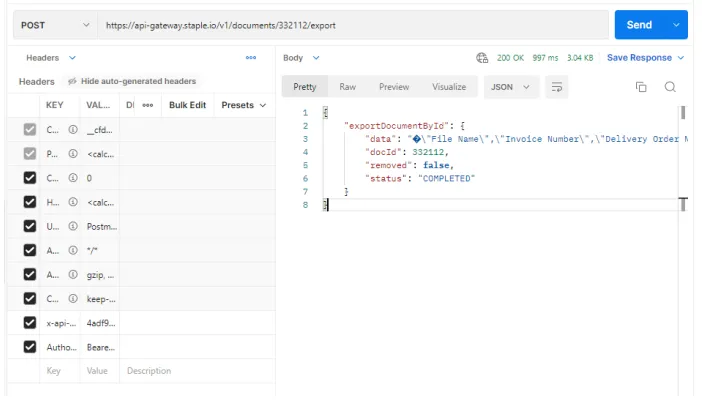
POST Export Document by ID
Users can export the document once it is completed. The endpoint “Export Document by ID” facilitates this. To complete the request, users have to add the two headers of “API key” and “Authorization”. Following this, the user has to enter their document ID in the URL.
POST Change Multiple Documents to Complete
To move document/s to the completed tab, users can resort to the “Change multiple Documents to complete” endpoint. The headers required to complete this request are the “API key” and the “Authorization token”. The document/s to be moved are specified in the request payload. Here, users can mention an array of all the documents to be moved.
Request

Response
